Thinkcar Thinkplus is a new OBD2 full system auto diagnostic tool. This article will share the related user manual.
Part 1: Thinkcar Thinkplus introduction
Part 2: Thinkcar Thinkplus how to register& update
Part 3: Thinkcar Thinkplus using guide
In detail…
Part 1: Thinkcar Thinkplus introduction
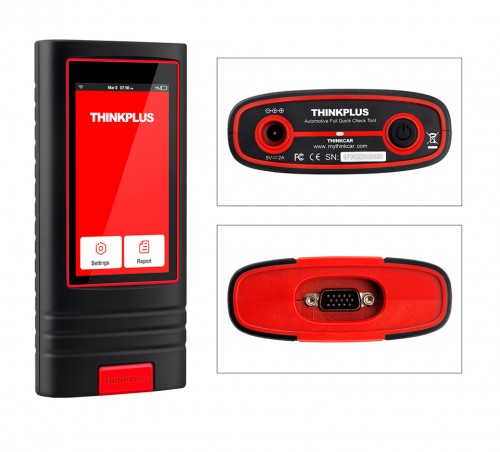
Thinkplus is a professional full-automotive quick scan tool for relevant industries, such as fast repair service, second-hand car and automobile insurance. It supports quick check and performs diagnosis report to you by email without any operation. All system tests only take 2 minutes.
Thinkcar Thinkplus Highlights:
1.Easy Testing: plug in OBD cable, without any extra operation
2.Diagnose automatically: generate diagnostic reports and send to email automatically
3.Complete diagnostic functions: OBD2 + Full System Diagnosis
4.Update automatically: software update automatically while connecting with wifi
5.Real-time voice broadcast
6.The first intelligent inspections tool in world
7.Only 2 minutes to finish all system test
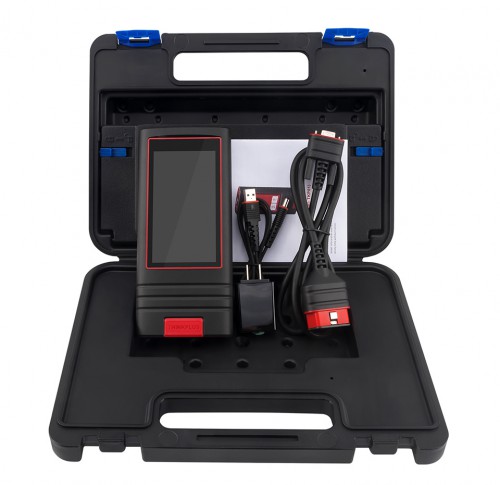
Thinkplus comes with main unit, OBD II diagnostic cable, DC 5V charging cable, user manual and power adapter.
Thinkcar Thinkplus Specification:
| Language: | English |
| Android system: | Android™ 7.1 |
| Screen: | 5″ touch color screen |
| Built-in Storage: | 8GB |
| Battery: | 6000mAh – Li-ion |
| Working Temperature: | -10 ~ 50°C |
| Storage Temperature: | -20 ~ 60°C |
Part 2: Thinkcar Thinkplus how to register& update
For first time to use, you need to register the Thinkplus firstly.
Step1: Tap “Next” on welcome screen
Step 2: Select Time Zone
Step 3: Set up Wifi
Note: If there is no available WiFi network to use, you can enable a personal hotspot.
Step 4: Input email address
Note: After you configured it, the system will automatically send the diagnostic report to the email box every time a complete Auto-Detect process is successfully finished.
Step 5: Fill in workshop information
Note: Once you saved the information, it will be automatically appended as a personalized “tag” on the diagnostic report each time the report is saved
Step 6: Agree user agreement
Step 7: Registration complete
Thinklplus update:
Software will update automatically while connecting with wifi.
It can help you to get more accurate test results in the Thinkplus by updating the latest diagnostic software. It is recommended to check for updates on a regular basis to keep current with the latest available software.
How to upgrade the system software?
Step 1: Switch thinkplus device on and ensure a stable internet connection.
Step 2: Select “Settings” -> “System Version”
Step 3: Tap “Check version” to enter the system upgrading page.
Step 4: Follow the on-screen instructions step by step to finish the process.
It may take several minutes depending on the internet speed. Please be patient. After the upgrade is successfully finished, the tool will automatically restart and enters the Job menu.
Part 3: Thinkcar Thinkplus using guide
1.How to connect and diagnose by Thinkplus?
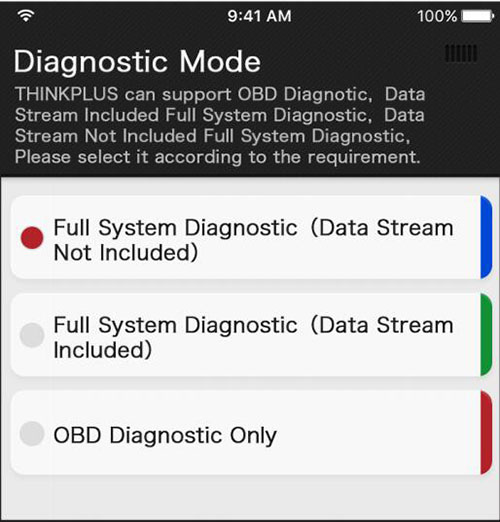
Step 1: Go to “Settings” -> “Diagnostic Mode” to assign ThinkPlus to execute the specific diagnostic operation according to different requirements
Note: Different kinds of reports are labeled with different colors. It can be easily identified in the Reports module.
Step 2: Turn the ignition off
Step 3: Plug one end of the diagnostic cable into the DB-15 connector of thinkplus device, and tighten the captive screws. Connect the other end to the vehicle’s DLC.
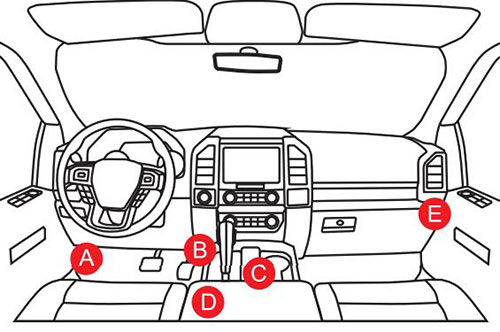
The location of vehicle’s DLC:
It provides standard 16 pins and is generally located about 12 inches away from the center of the instrument panel, under or around the driver’s side for most vehicles. For some vehicles with special designs, the DLC location may vary. Refer to the following figure for its location.
Step 4: After connection, turn the ignition key on, and the system enters the auto detect mode
Please kindly notice:
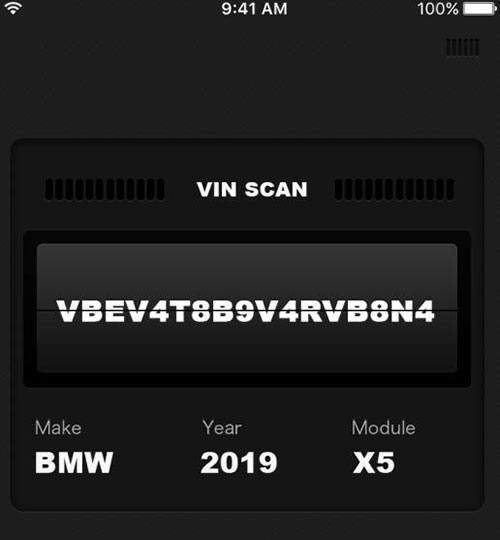
1.After the system successfully obtains the VIN information of the currently identified vehicle, it will continue scanning the vehicle systems.
After the scanning is complete, a diagnostic report will be automatically generated and sent to your email box (if bound).
2.If the thinkplus failed to access the VIN information, the system would navigate to the Job Menu (*the tested vehicle model is not supported on this tool).
*CAUTION: Don’t connect or disconnect any test equipment with the ignition on or engine running.
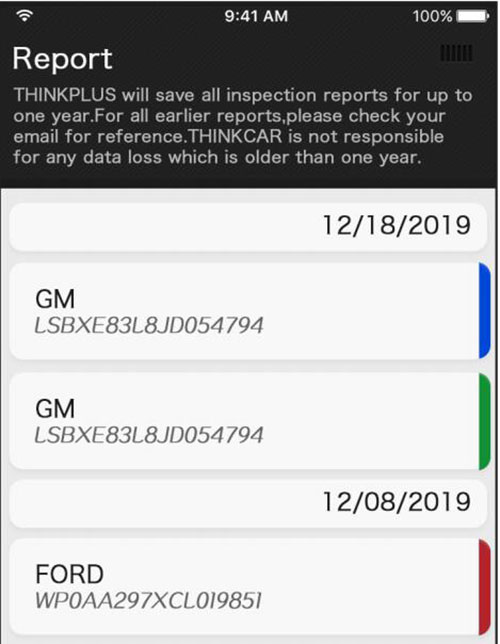
2.How to view reports on Thinkplus?
Press “Report” on the Job Menu to check all diagnostic reports.
All reports are listed in date sequence. Tap a certain report to view its details.
Generally, a report consists of the following parts:
1.Report name and issuer
2.Vehicle information (Incl.VIN, Brand/model and Year etc.)
3.Inspection organization (The shop name and address preset in process of the sign-up are stamped here.)
- Contents of the professional diagnostic report (If DTCs are present in certain system, it will highlighted in Red. Otherwise it will be displayed in Black.)
- Disclaimer
3.How to renew software subscription?
If the Thinkplus service period is due, please follow the steps below to renew the software subscription.
1).Tap “Setting ”-> “Expiration Date ” -> “Renewal ”
2).Then follow the on-screen prompts to finish the transaction.